
-
Prep Time10 minutes
-
Cook Time30-40 minutes
-
Serving12
-
Serv Size1 piece
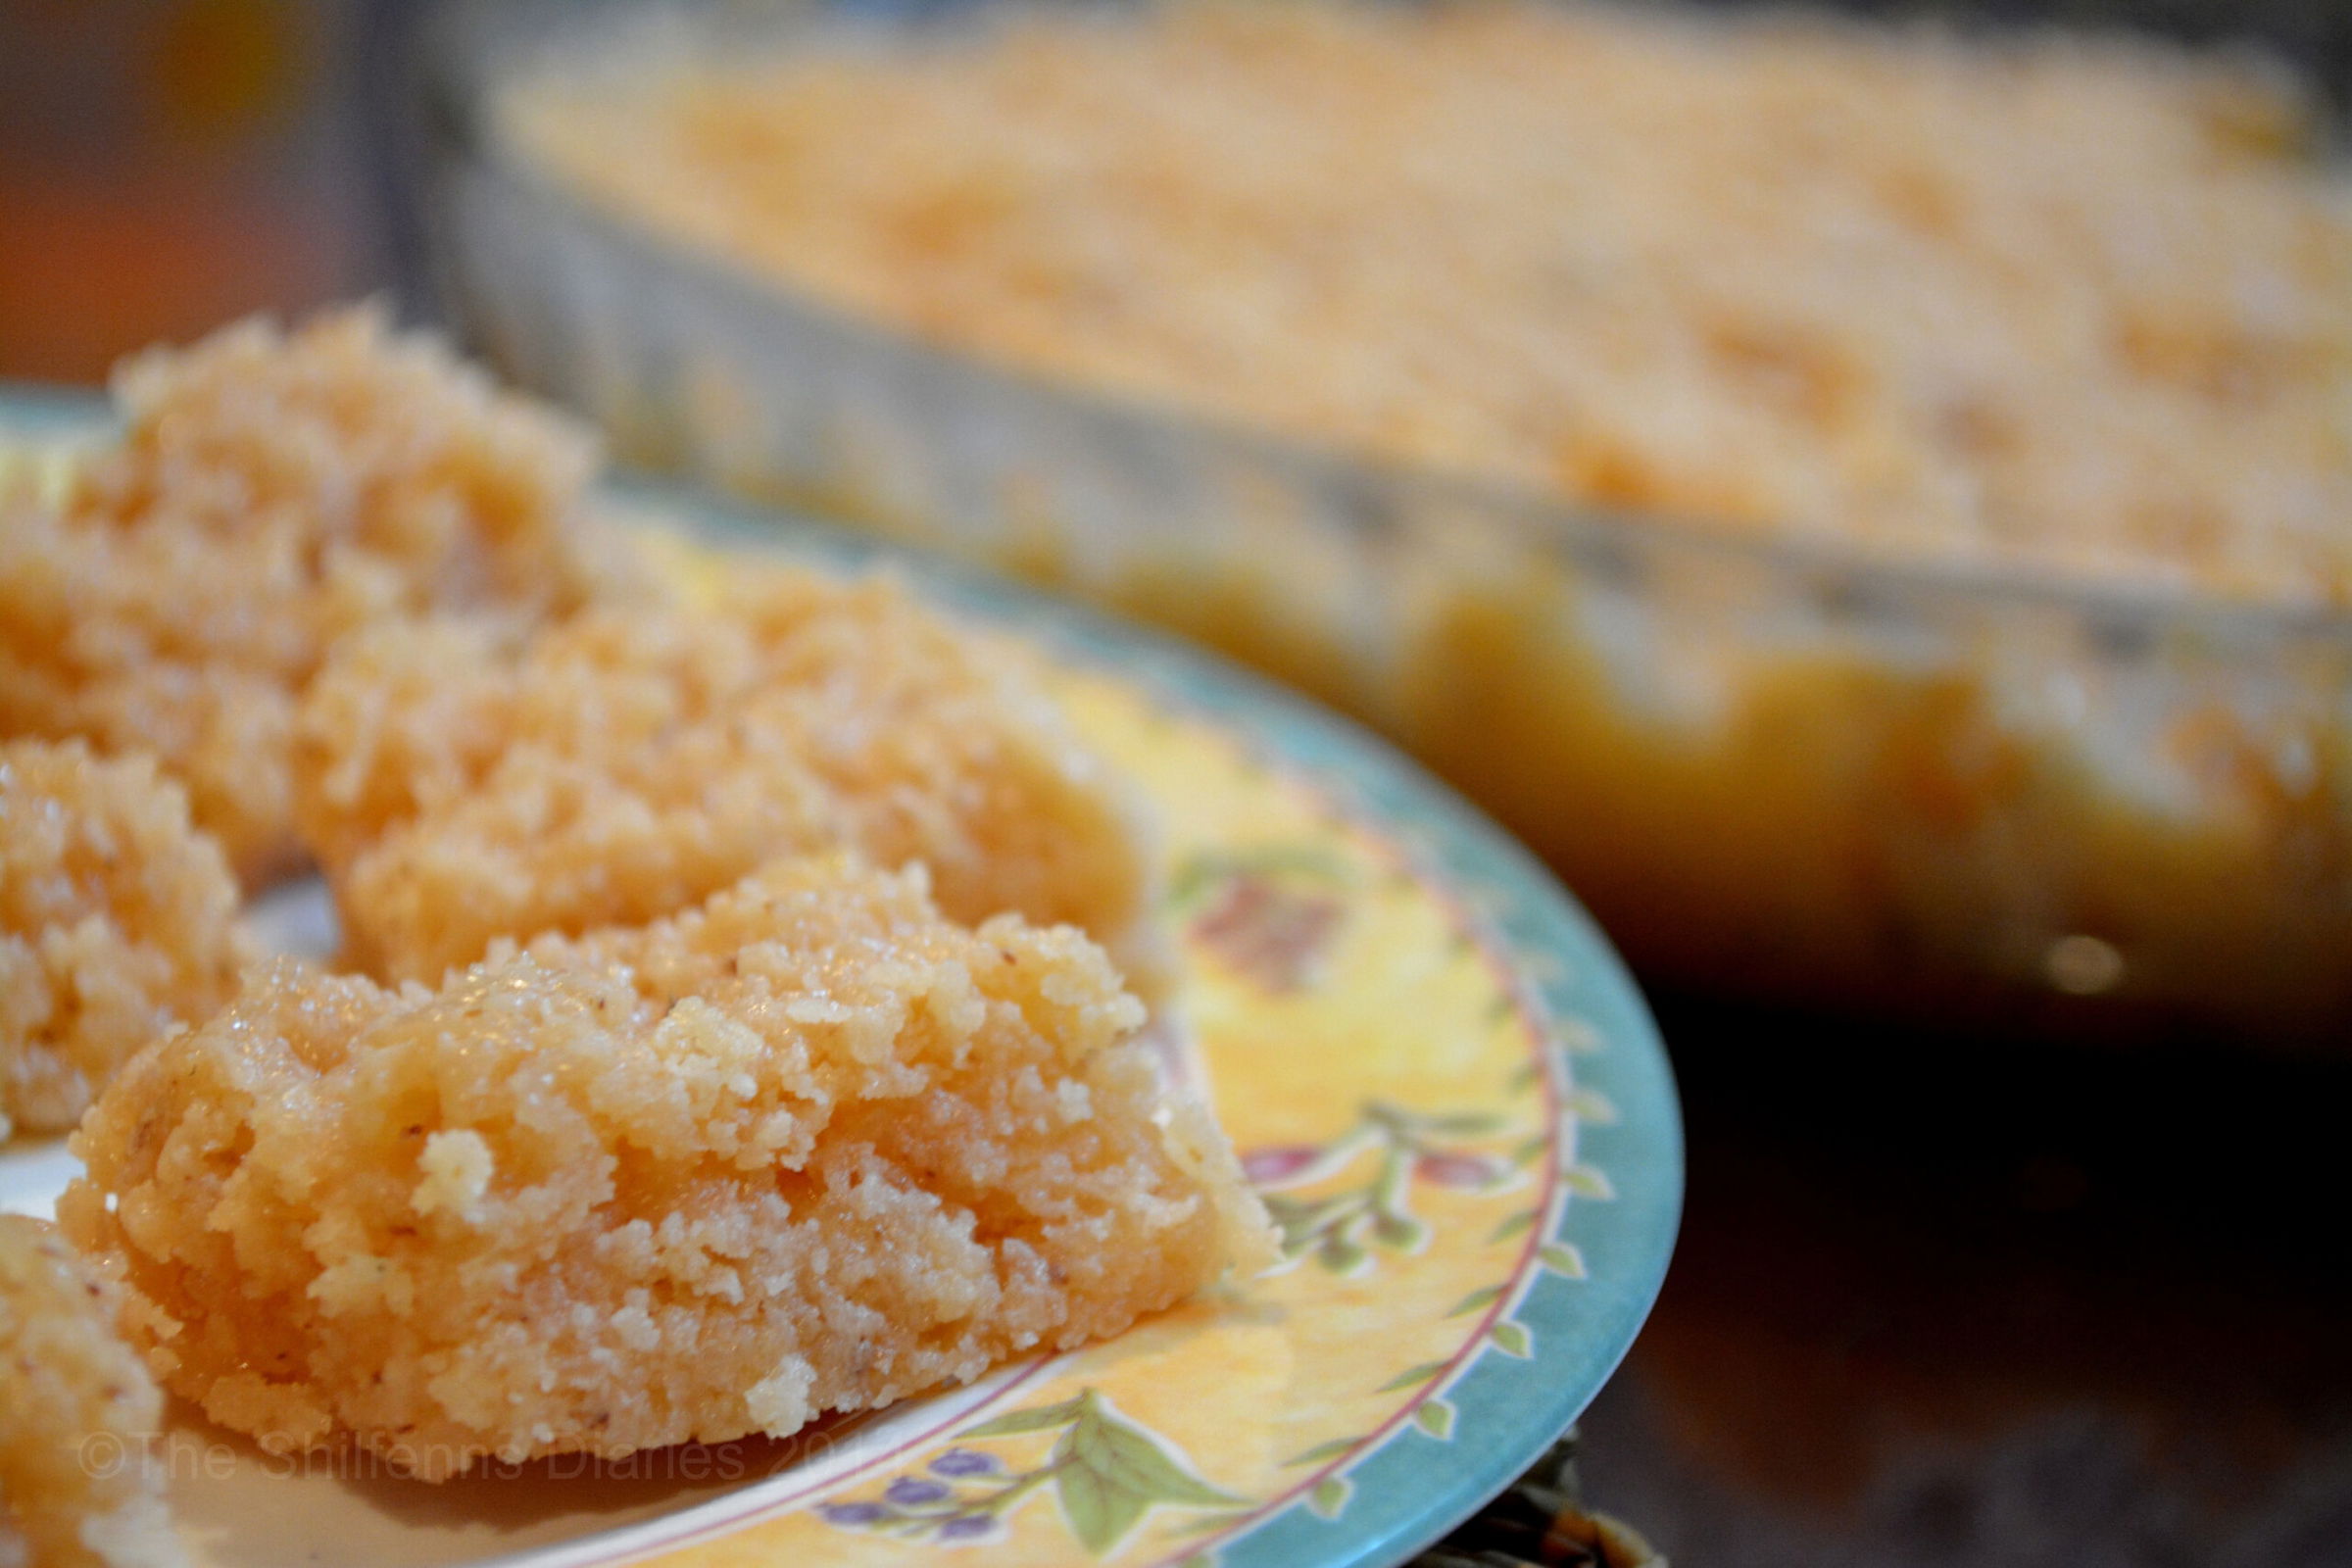
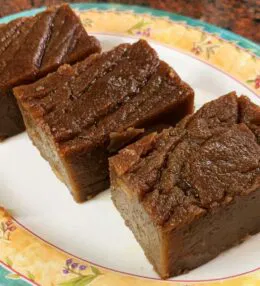
Here’s Burfi #2 from my mom’s treasured cookbook — a simple yet nostalgic coconut burfi that holds a special place in our family. We used to make this at home quite frequently, especially because it was my dad’s favorite. As a child, I’d often watch my mom make it from scratch, taking in the delicious smell and the way she patiently stirred the mixture. Later, it became something we’d make together.
This sweet and coconutty burfi has a crumbly texture with just a hint of chewiness and is surprisingly easy to pull off, even for beginner sweet-makers. Though it does require some time and patience (mostly in the form of stirring), the results are well worth it. Since my dad passed away, we haven’t made this as often, but it still brings back comforting memories every time. And yes, the boys love it too! Whether you’re making it for a festival or simply to recreate a bit of home, this recipe is a heartfelt, delicious classic.
Ingredients
Coconut Burfi
Directions
Making this coconut burfi is just as enjoyable as eating it. The steps are simple and the ingredients are few, but like many traditional sweets, it’s the slow stirring and careful timing that bring everything together. Whether you’re recreating a childhood memory or trying it for the first time, follow along step by step and you’ll soon have a tray of sweet, fragrant burfis ready to share.
Prepare the base mixture: In a non-stick pan, combine the water, milk, and sugar. Stir gently over medium heat until the sugar dissolves completely, then bring the mixture to a boil.
Add color and coconut: Once the mixture is bubbling, add your desired food coloring and the grated coconut. Mix thoroughly, ensuring the coconut is evenly coated and begins to absorb the liquid.
Simmer and stir: Continue cooking the mixture, stirring constantly, until all the moisture is absorbed and the mixture begins to thicken.
Flavor with cardamom: Sprinkle in the cardamom powder and mix well to evenly distribute the flavor.
Incorporate the ghee: Add the ghee one tablespoon at a time, stirring continuously after each addition. Keep stirring patiently as the mixture gradually thickens and begins to leave the sides of the pan.
Check for doneness: The Burfi is ready when the mixture turns slightly glossy, develops a honeycomb-like texture, and no longer sticks to the sides of the pan.
Set and slice: Quickly transfer the hot mixture onto a well-greased plate or tray. Flatten it out evenly, let it cool slightly, then cut into squares or diamonds while still warm.
Conclusion
Once set and cut into pieces, this coconut burfi makes for a lovely treat, perfect as a sweet bite after a meal. It stores well for a few days at room temperature, making it great for sharing with family or offering guests. Simple, nostalgic, and full of coconut flavor, it’s the kind of recipe that quietly becomes a household favorite.

Leave a Review